Store notifications vs AppActor webhooks
Use store notifications to keep AppActor current. Use Outbound Webhooks or integrations when your own backend needs to react to the processed lifecycle event.
Runtime flow
Apple App Store Server Notifications
Apple notifications are configured per iOS app.What you need
- iOS app created in AppActor
- Bundle ID configured on that app
- Apple App ID when production App Store Server API checks need it
- Apple credential connected
- AppActor Apple notification URL from the app detail page
Setup path
- Open the iOS app in AppActor.
- Copy the Apple notification URL shown in the app detail page.
- Open App Store Connect and select the matching app.
- Paste the URL into App Store Server Notifications for both production and sandbox where applicable.
- Send a test notification from AppActor.
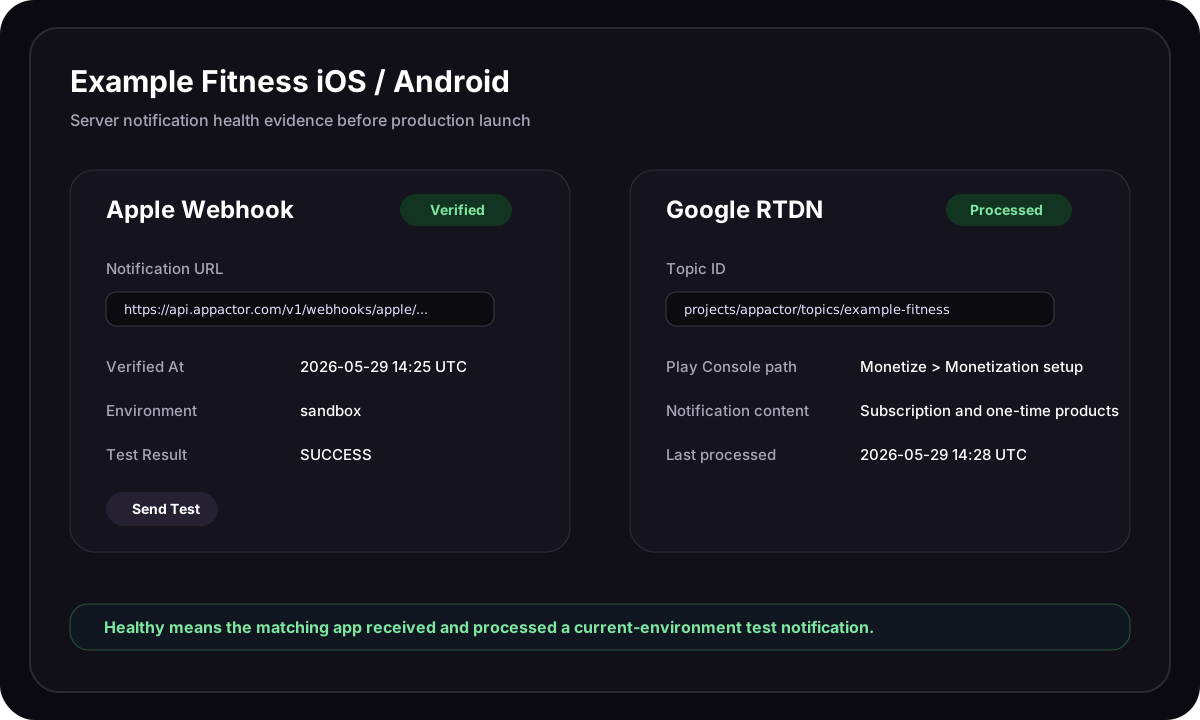
- Confirm the AppActor app detail page shows a verified state, environment, and test result.
Apple supports one App Store Server Notification URL per environment. If your own backend also needs purchase events, prefer receiving processed AppActor webhooks instead of splitting store notifications between systems.
Apple details to watch
- Use the notification URL for the matching AppActor iOS app, Bundle ID, and environment.
- Apple sends signed notification payloads. AppActor verifies and normalizes them before updating entitlement state.
- AppActor uses Apple transaction timing such as
signedDate, purchase dates, expiration dates, revocation dates, and renewal info to classify renewals, refunds, billing issues, grace, and expiry. - If Apple test notification is not healthy, check the App Store Connect app, Bundle ID, credential, and environment before changing SDK code.
Google Real-time Developer Notifications
Google RTDN is configured per Android app and delivered through Google Cloud Pub/Sub. AppActor creates each app’s Pub/Sub topic and push subscription in the Google Cloud project of the app’s service account, your own project. It does this only when you act: when you click the button on the app page’s Google Play card (Connect, Check again or Try again), or save the app or its credential. Nothing is created in the background. The subscription is created without an expiry, so it is not deleted when an app has no purchases for a while. AppActor removes the topic and subscription when you delete the app. The subscription pushes to AppActor’s address for the app with a long secret key in it, which only your project and AppActor know. Nothing signs the pushes, so the service account needs no role beyond Pub/Sub Admin. AppActor keeps only a hash of the key, and it still checks every notification with Google before it changes a customer.What you need
- Android app created in AppActor
- Package name configured on that app
- Google Play service account credential connected
- service account invited to the app in Play Console
- required Play Console permissions granted
- in the service account’s own Google Cloud project:
- the Cloud Pub/Sub API turned on
- the Pub/Sub Admin role for the service account
Google Cloud can take a few minutes to apply a role change. If Try again is refused right after you grant a role, wait a few minutes and click it again.
Setup path
- Open the Android app in AppActor. The Google Play card shows one light: green (connected), yellow (steps left) or red (something to fix).
- Make sure the package name and Google credential are connected.
- In the service account’s Google Cloud project, turn on the Cloud Pub/Sub API and give the service account the Pub/Sub Admin role. The card shows the account to copy and opens the right page in Google Cloud.
- Click Connect. AppActor creates the topic and subscription in that project. If Google Cloud refuses, nothing is created and the card turns red and says what to change.
- Copy the topic the card shows.
- In Play Console, go to Monetize with Play > Monetization setup and turn on real-time notifications.
- Paste the topic.
- Select the notification content shown on the card.
- Send Google’s test notification.
- Click Check again. The card turns green once a notification for the app has arrived.
When the card is red
The card says what is wrong in one sentence, what to do, and shows an error code. After a change in Google Cloud or Play Console, click Try again. A new key file needs no click: saving it in the app’s settings sets Google Play notifications up again.
When you contact support, click Copy for support on the card and paste what it copies. It holds the error code, the app, its package, the service account, the Google Cloud project, the step that failed and Google’s own message, so support can see what happened without asking.
Google details to watch
- Use the Topic ID for the matching AppActor Android app and Play Console package.
- The Google service account must have access to the target Play app.
- The topic and subscription live in your Google Cloud project. Keep them while the app is live; AppActor manages them.
- An app set up before topics moved to customer projects keeps its topic in AppActor’s project and needs no Google Cloud roles.
- AppActor treats RTDN as a wake-up signal and then verifies subscription or one-time purchase state with Google.
- Google event timing such as
eventTimeMillisis used when available for voided purchases, refunds, and notification ordering. - If the RTDN test is not healthy, check package binding, service account permissions, Pub/Sub setup, and Play Console notification content before changing SDK code.
Health states to understand
Healthy evidence
Before launch, capture these dashboard facts for each platform app:Before go-live
- Apple notification URL is configured for the correct app and environment.
- Apple test notification succeeds.
- Google Topic ID is pasted into the correct Play Console app.
- Google test notification is received and processed.
- AppActor products, entitlements, and offerings are connected.
- Your own backend uses Outbound Webhooks or server-side access checks instead of raw store notifications for app access decisions.