offerings.current is null, a helper like monthly is empty, or a purchase screen has nothing to render, the issue is often upstream catalog setup rather than SDK installation.
Safe example catalog
Use example project/app names in docs and tutorials. Do not screenshot real app names, secret keys, webhook URLs, JWTs, or store credentials.
What your app expects
Your mobile app expects AppActor to already know:- which public app SDK key belongs to the running app
- which store products belong to iOS and Android
- which entitlement keys represent premium access
- which offering should be returned as
current - which package slots such as
monthlyandannualare populated inside the offering - which products unlock which entitlements
First catalog recipe
For a RevenueCat/Qonversion-style starter catalog, create this exact shape first:- Entitlement:
premium. - iOS products:
com.example.fitness.pro_monthlyandcom.example.fitness.pro_annual. - Android products:
pro_monthlyandpro_annual, withbasePlanIdandofferIdfilled when Google Play uses them. - Product mapping: every monthly and annual product unlocks
premium. - Offering:
default, marked as current. - Packages:
monthlyandannual, each mapped to the correct iOS and Android products. - SDK key: use the platform app’s public
pk_...key in the client.
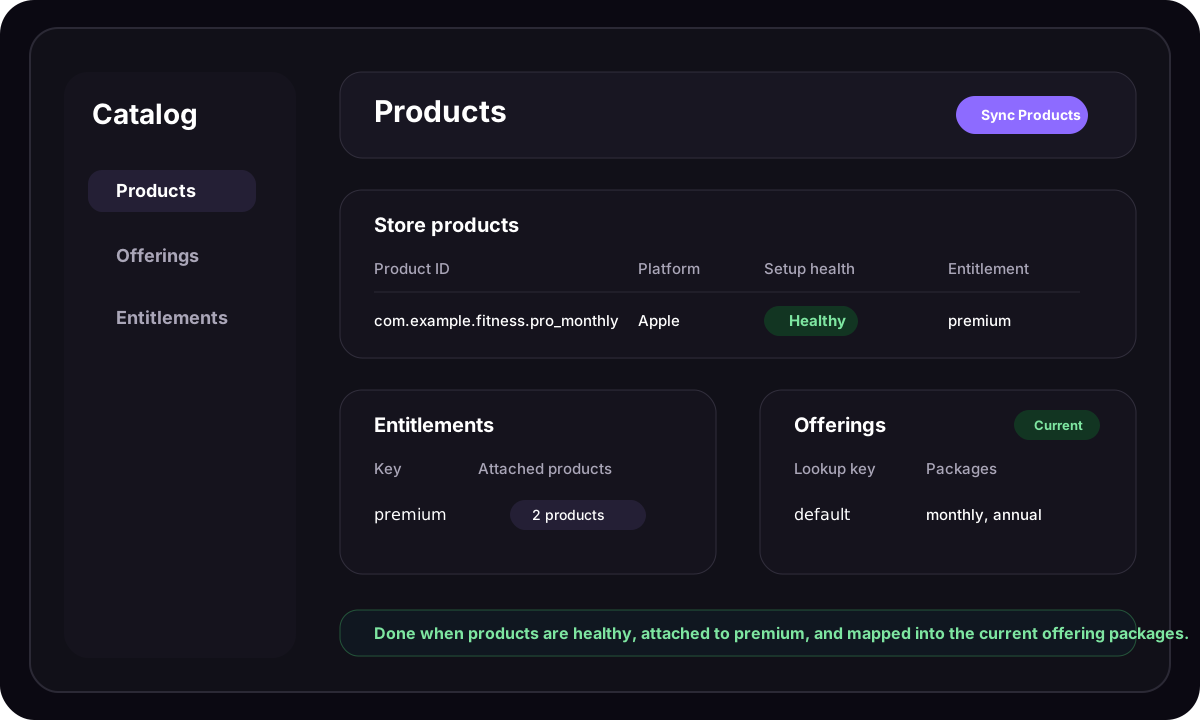
Done-when checklist
Use this checklist before you open app code:1. Copy the public SDK key
Thepk_... value used in configure(...) is the public client key for a specific AppActor app.
Use the matching key for the app you are integrating. If you run different keys per platform, wrappers should use the platform-key surfaces instead of one shared string.
Flutter and React Native wrappers should use AppActorPlatformKeys when iOS and Android apps have separate public keys.
2. Define entitlements first
Entitlements are the access concepts your app gates on, such as:premiumproplus
- Display name: human-friendly, such as
Premium. - Key: stable app-facing identifier, such as
premium. - Attached products: every product that should unlock the entitlement.
- Notes: optional internal explanation for support or billing teams.
3. Connect store products
Create the real products in:- App Store Connect for iOS
- Google Play Console for Android
4. Attach products to entitlements
Every product that should unlock premium access must be attached to the entitlement your app checks. If the customer buyscom.example.fitness.pro_monthly but that product is not attached to premium, the purchase can finish while hasActiveEntitlement("premium") still returns false.
5. Build at least one offering
An offering is the server-defined purchase bundle your app fetches before it renders UI. For a basic rollout, make sure you have:- one current offering
- one or more package entries inside that offering
- package-to-product mappings that line up with the store products you created
- Offering ID or lookup key, such as
defaultoronboarding. - Current offering flag for the default paywall.
- Package order, so the paywall renders intentionally.
- Optional metadata for badges, copy, placement-specific labels, or experiment variants.
6. Populate package slots intentionally
Most quickstarts use helpers like:current?.monthlycurrent?.annualcurrent?.lifetime
7. Sanity-check the catalog before app integration
Before you debug client code, confirm all of these are true:- the public app SDK key is the one you expect to ship
- the app has at least one current offering
- the offering contains the packages your paywall expects
- the package slots used in code are actually populated
- the mapped products unlock the entitlement keys your app gates on
Runtime chain
Common failure patterns
If the SDK configures correctly but your paywall is empty, check this order:- Is the SDK using the right
pk_...key? - Does the project have a current offering?
- Does that offering include the package slot your code reads?
- Does the package map to a real store product for that platform?
- Is the product attached to the
premiumentitlement? - Did the app refresh customer info after purchase?
- Is the entitlement status
activeor validgrace? - Is the customer using the same stable
appUserId? - Is verification trusted enough for the feature you are unlocking?
Debug by symptom
Next pages
Entitlements
Define stable access keys and attach products before checking access in app code.
Products and Packages
Learn why AppActor fetches offerings and packages instead of exposing a cross-platform
getProducts() call.Offerings
Fetch the current offering and select monthly, annual, lifetime, or custom package slots.
Displaying Products
Map packages into your own paywall cards with prices, descriptions, metadata, and empty states.
Making Purchases
Purchase a package, handle success/cancelled/pending, and unlock from customer info.