How AppActor is organized
Dashboard happy path
Use this exact first-run click path for theAppActor Example style setup:
- Open the project switcher, select New Project, enter the project name, and create the project. If the project already exists, select it.
- Open Apps.
- Select Add app. If this is the first app in an empty project, the empty state may show New app instead.
- Choose the platform, enter the Bundle ID or package name, and select the matching Apple or Google credential when the form asks for it.
- Open the new app detail page.
- Copy the Public Key (
pk_...) for the running platform. This is the public SDK key used in client configure calls. - Open Catalog > Products.
- Select the platform tab and click Sync Products. If the modal shows New Products Found, select the products, classify them, and click Import Products.
- Open Catalog > Entitlements.
- Create or open
premium, then use Manage Products and Attach Products to attach the imported products. - Open Catalog > Offerings.
- Select New offering, then Add Package for slots such as
monthlyandannual. - Map each package to the correct platform product and click Save Changes.
- Use Set as Current so the SDK can return the offering from
offerings.current.
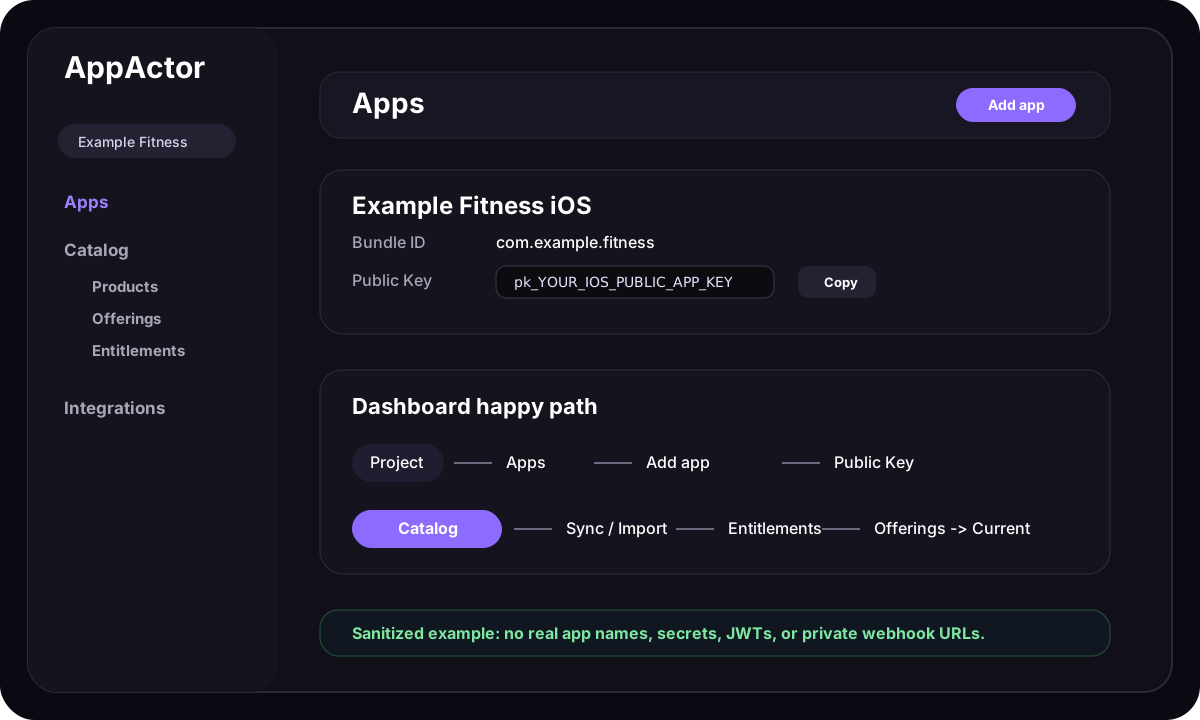
The image is intentionally sanitized. It shows the real AppActor dashboard flow and labels, but uses example names, fake keys, and fake URLs.
1. Create a project
Create one AppActor project for the product you are shipping. The project should contain every platform app that shares the same customer and entitlement model. Use a project when you want iOS, Android, Flutter, or React Native builds to unlock the same logical access keys. Dashboard checklist:- use the project switcher to create or select the project, then keep a safe internal name such as
Example Fitness - keep one project for apps that share the same users and entitlements
- open the project before creating apps, catalog objects, integrations, or webhooks
- avoid putting real secrets, JWTs, webhook URLs, or private store keys into screenshots
2. Add your iOS app
For Apple App Store apps, add the iOS app under the project and keep these values aligned:- Bundle ID, such as
com.example.fitness - Apple App ID, when production App Store Server API or notification checks need it
- Apple credential with key ID, issuer ID, and private key
- the generated AppActor public app SDK key, used by the client SDK
pk_... public SDK key in AppActor.configure(...).
3. Add your Android app
For Google Play apps, add the Android app under the project and keep these values aligned:- Package name, such as
com.example.fitness - Google Play service account credential
- Play Console access for the target app
- the generated AppActor public app SDK key, used by the client SDK
pk_... public SDK key in AppActor.shared.configure(...).
4. Connect store products
Create the real products in App Store Connect and Google Play Console first, then connect or import them into AppActor. For a starter subscription flow, use a simple catalog shape:5. Attach products to entitlements
Every store product that should unlock premium access must be attached to the entitlement your app checks. If a purchase succeeds buthasActiveEntitlement("premium") stays false, check product-to-entitlement mapping before changing SDK code.
6. Build the offering your app expects
The SDK fetches offerings and packages, not a raw cross-platform product list. Make sure the current offering contains the package slots used by your paywall code. For example, if the app callscurrent?.monthly, the monthly package slot must exist in the current offering and map to platform products for the running app.
7. Use the right public app SDK key
Use the public app SDK key for the platform build that is running:- native iOS uses the iOS app key
- native Android uses the Android app key
- Flutter and React Native should choose the iOS key on iOS and the Android key on Android when your project has separate platform apps
Healthy setup states
Before you debug client code, the dashboard should show a healthy chain:Release readiness checklist
- The AppActor app has the correct Bundle ID or package name.
- Store credentials are connected and healthy.
- Products exist in the store and are available to the tester.
- Products are connected in AppActor.
- Products attach to the entitlement your app checks.
- A current offering exists.
- The offering contains the package slots your UI reads.
- Platform server notifications are connected before launch.